

Introduction
If you’ve ever faced engine hesitation, rough idling, or a check engine light flickering on your dashboard, a clogged or stuck EGR valve might be the culprit. As an experienced auto enthusiast or everyday driver, knowing how to fix a stuck EGR valve can save you time, money, and stress.
Rest assured, resolving this issue is often straightforward once you understand the process. Addressing a stuck EGR valve promptly can improve engine performance, reduce emissions, and prevent more costly repairs down the line.
In this guide, I’ll walk you through everything you need to know—from understanding what an EGR valve is to detailed steps on how to fix a stuck one, plus essential tips, common mistakes to avoid, and alternatives if the traditional fix doesn’t work. Let’s get started!
What Is an EGR Valve and Why Does It Matter?
Definition List
- EGR Valve (Exhaust Gas Recirculation Valve): A component that reduces nitrogen oxide emissions by recirculating a portion of your engine’s exhaust gases back into the combustion chamber.
- Purpose: Improves fuel efficiency, reduces harmful emissions, and helps your vehicle meet environmental standards.
- Common Issues: Carbon buildup, deposits, or a faulty actuator can cause it to stick open or closed, affecting engine performance.
Why an EGR Valve Needs to Be Fixed
A stuck EGR valve can lead to:
- Rough idling
- Reduced fuel economy
- Increased emissions
- Engine knocking or pinging
- Check engine light activation
Getting it fixed promptly ensures your vehicle runs smoothly and stays eco-friendly.
Step-by-Step Guide to Fixing a Stuck EGR Valve
Tools and Materials Needed
- Screwdrivers (flathead and Phillips)
- Socket set and ratchet
- EGR valve cleaning kit or carburetor cleaner
- Gasket scraper or wire brush
- Replacement gaskets (if necessary)
- Safety gloves and goggles
- Vehicle service manual
- Gloves and rags
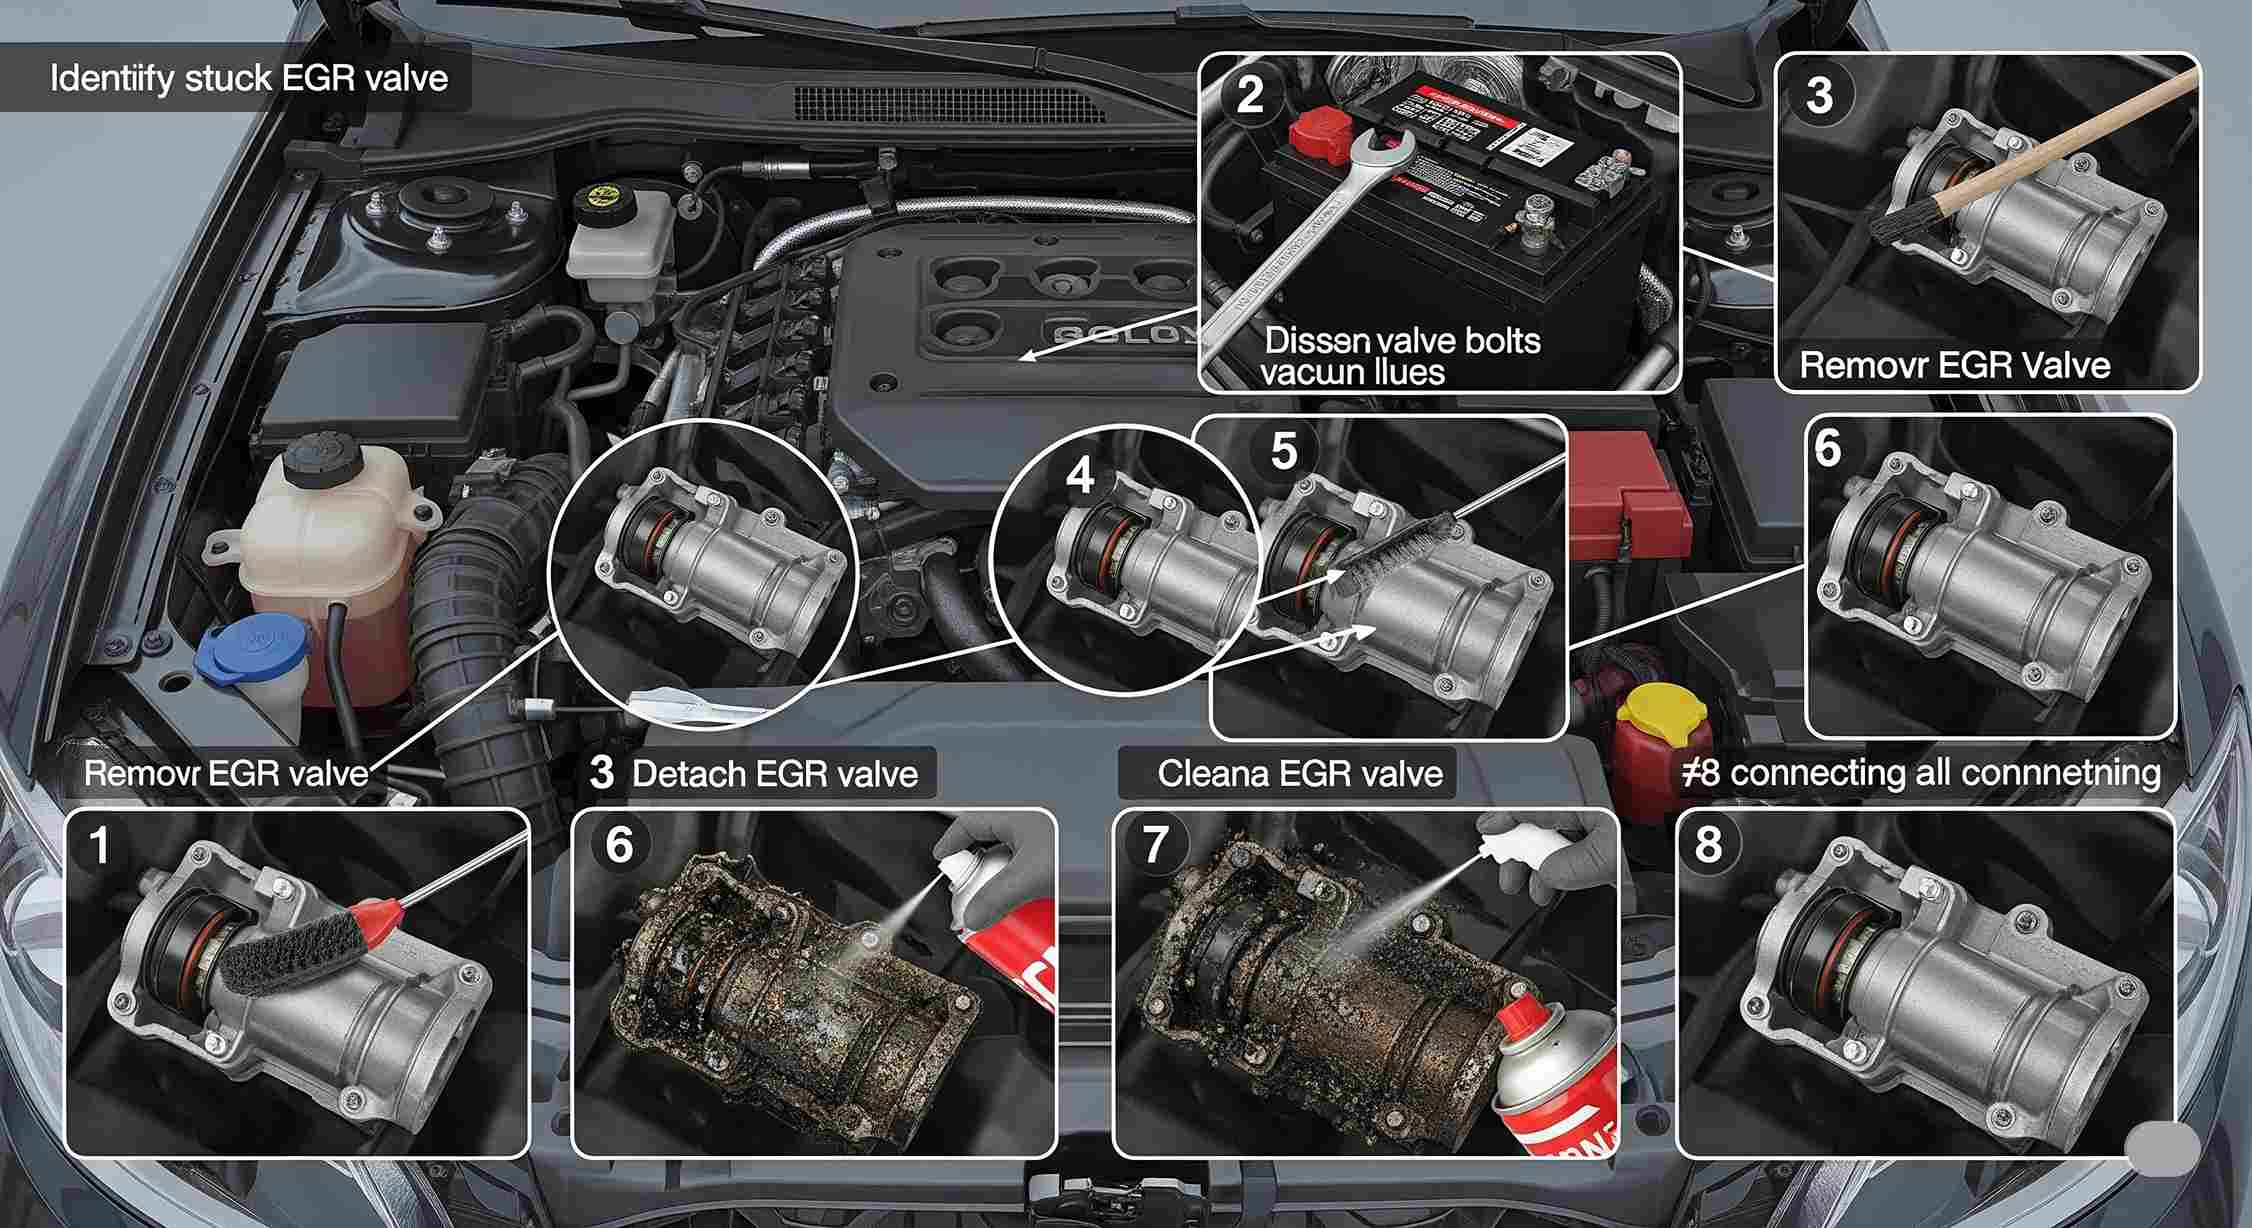
Step 1: Confirm the EGR Valve Is the Issue
Before diving into repairs, verify that your EGR valve is stuck. Signs include:
- Diagnostic trouble codes (e.g., P0401, P0402)
- Visible carbon deposits or grime on the valve
- Rough engine idling
- Poor acceleration
Use an OBD-II scanner for accurate diagnosis. If confirmed, proceed with cleaning or replacement.
Step 2: Locate the EGR Valve
- Refer to your vehicle manual to find the exact location.
- Typically situated near the intake manifold or on the engine’s top or side.
- Take photos beforehand to help during reassembly.
| Vehicle Make | Common EGR Valve Locations |
|---|---|
| Honda Civic | Near the throttle body |
| Ford F-150 | On the intake manifold |
| Toyota Camry | Behind the engine, near the firewall |
Step 3: Disconnect the Battery and Prepare the Vehicle
- Disconnect the negative terminal to avoid electrical shorts.
- Allow the engine to cool down.
- Remove any plastic covers or components obstructing access.
Step 4: Disconnect EGR Valve Components
- Disconnect vacuum lines or electrical connectors.
- Carefully loosen mounting bolts using the appropriate socket.
- Remove the EGR valve from the engine.
Step 5: Clean the EGR Valve
- Check for carbon deposits, sludge, or grime.
- Use a specialized EGR cleaner or carburetor cleaner for effective removal.
- Scrape off stubborn deposits with a wire brush or gasket scraper.
- Clean the passages in the intake manifold as well.
Step 6: Inspect and Replace Gaskets
- Examine gaskets for cracks or damage.
- Replace if necessary to prevent vacuum leaks.
Step 7: Reinstall the EGR Valve
- Position the cleaned or new gasket.
- Reattach the valve and tighten bolts to specified torque.
- Reconnect vacuum lines or electrical connectors.
- Reinstall any covers or components removed earlier.
Step 8: Reconnect the Battery and Test
- Reattach the negative terminal.
- Start the vehicle and observe for proper operation.
- Use an OBD-II scanner to clear any trouble codes.
- Take a short drive to ensure smooth performance.
Tips for Success
| Tip | Explanation |
|---|---|
| Always consult your vehicle manual | Different models may have specific requirements. |
| Use the right cleaning products | Avoid harsh solvents that may damage components. |
| Replace gaskets and seals | Prevent future leaks or issues. |
| Check related components | Like the vacuum lines and intake manifold for blockages or damage. |
| Perform a road test post-repair | Confirm everything’s functioning correctly. |
Common Mistakes and How to Avoid Them
- Forgetting to disconnect the battery: Could cause electrical shorts or damage.
- Using aggressive cleaning methods: Can damage the EGR valve or passageways.
- Over-tightening bolts: Might crack the valve or manifold.
- Neglecting to replace gaskets: Leads to leaks and recurring issues.
- Misdiagnosing the problem: Always verify the EGR is truly stuck before attempting repairs.
Variations and Advanced Fixes
If cleaning doesn’t solve the problem, consider:
- Replacing the EGR valve: When it’s broken or excessively worn.
- Upgrading to a performance EGR valve: For higher durability.
- Installing a block-off plate (for racing or performance tuning): Though not legal for street use.
- Performing a full intake manifold cleaning: When carbon buildup is extensive.
Why Fixing Your EGR Valve Matters
An optimized EGR system is vital for environmental compliance and engine health. A stuck valve not only hampers performance but also increases emissions, possibly leading to failed emissions tests. Regular checks and maintenance, along with timely repairs, extend your vehicle’s lifespan and protect your wallet.
Final Thoughts
Fixing a stuck EGR valve doesn’t have to be daunting. With the right tools, some patience, and our step-by-step approach, you can restore your engine’s efficiency and emissions compliance. Remember, precision matters—take your time, follow safety protocols, and consult your vehicle manual for specifics.
By understanding this essential component and knowing how to address issues, you’re better equipped to keep your vehicle running smoothly and responsibly.
Disclaimer: If you’re uncomfortable performing these steps yourself, don’t hesitate to seek professional assistance. Proper maintenance is key to vehicle longevity and safety.
